Overview
The clip generator module can be used to generate short sound clips (typically a second or so long) in response to either an automatic detection or to the user selecting an area on the spectrogram display.
Creating a Clip Generator
From the File>Add modules>Sound Processing menu, or from the pop-up menu on the data model display select “Clip Generator”. Enter a name for the new amplifier module and press Ok.
Configuring the Clip Generator
To configure the clip generator, you will need to set a source of audio data and also to set up triggers which can initiate clip generation.
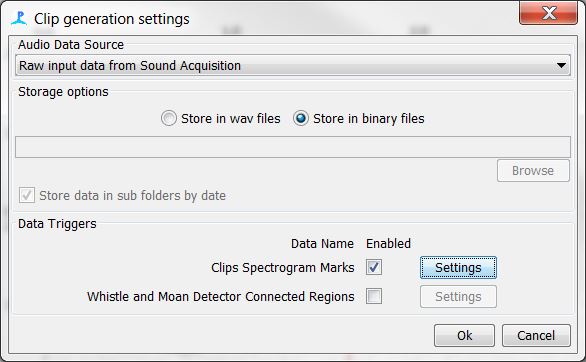
To set up the clip generator, open the dialog from the “Detectors/Clip Generator” menu

Select an audio data source
Select a source of audio data. This will usually be from a sound acquisition module but it may also be from a decimator or filter module
Select an output format
Select to store the clips either as wav files or in binary storage. The advantage of wav files is that it will be possible to open your clips with other software. The binary storage option stores the clips in a compressed format which uses slightly less disk space and also loads the clips more efficiently when looking at them with the PAMGuard viewer.
Even if you are using wav file storage, you should include the Binary Storge module in your PAMGuard configuration since some book keeping information will still need to be stored in binary files
Setup Data Triggers
Select which detectors can trigger clips.
This can be one or more of the detectors set up in PAMGuard. If using more than one detector though, you might find it easier to have separate clip generators for each detector so that files / binary data are stored in different folders.
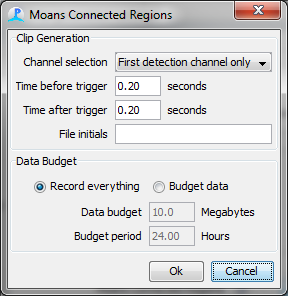
Once you’ve enabled a trigger, configure it by pressing the adjacent “Settings” button

Select the channels you want to trigger from
Select the time in seconds before and after the actual trigger you want to record for.
If data are being stored in wav files, also set “file initials” - a few characters which will be added to the start of each file name
Data Budgets
You can set the clip generator to respond to every single detection or you can set a data budget which will limit the amount of recorded data in a given time period.
The latter option may be useful if you only want to store a few example sounds from each encounter for species id check, but also runs the risk of discarding important data !
Manual clipping
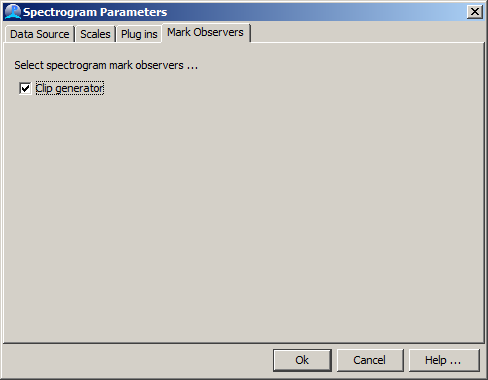
To generate clips manually, right click on a spectrogram display to open it’s settings dialog. Go to the “Mark Observers” tab and select the Clip Generator check box.
When the spectrogram display is running, you will now be able to mark out regions with the mouse which will be used to fire the clip generator.
