Adding and Configuring
From the File>Add Modules>Utilities menu select ‘Spectrogram Annotation’ to add a spectrogram annotation module to your configuration.
You can have as many spectrogram annotation modules in your configuration as you like, but it is wise to only have one associated with each spectrogram panel in your displays.
Generally, you should change the name of each spectrogram annotation module to something more meaningful such as “Gunshots” or “Dolphin Whistle”
Spectrogram Settings
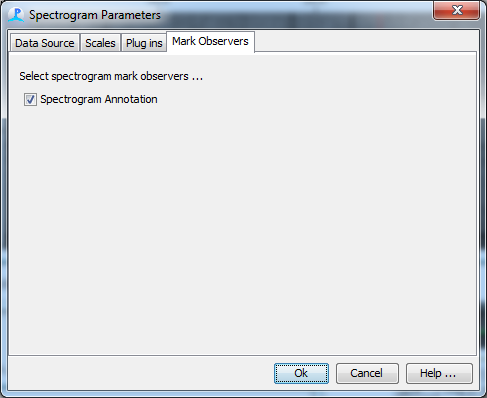
Once one or more spectrogram annotation modules have been added to a configuration, you will find them listed on the “Mark Observers” tab of the spectrogram display settings (right click on the spectrogram to view these).

Check the spectrogram annotations you wish to associate with that spectrogram panel and close the dialog. The selected annotation modules will now recieve mouse messages when the mouse is dragged across the display.
Spectrogram Display
If you wish to see the marks on the display once they have been created, you will also have to right click on the spectrogram panel and select the spectrogram annotation module you wish to be displayed.
Colour
Marks will always be drawn in red as the mouse is being dragged across the spectrogram.
The default colour for marks once they have been created is black. This can be changed from the Display>Symbols>Your Annotation Module menu. In the symbol dialog only the top (line colour) colour is used, the fill colour and symbol type are ignored.