Measuring to the horizon
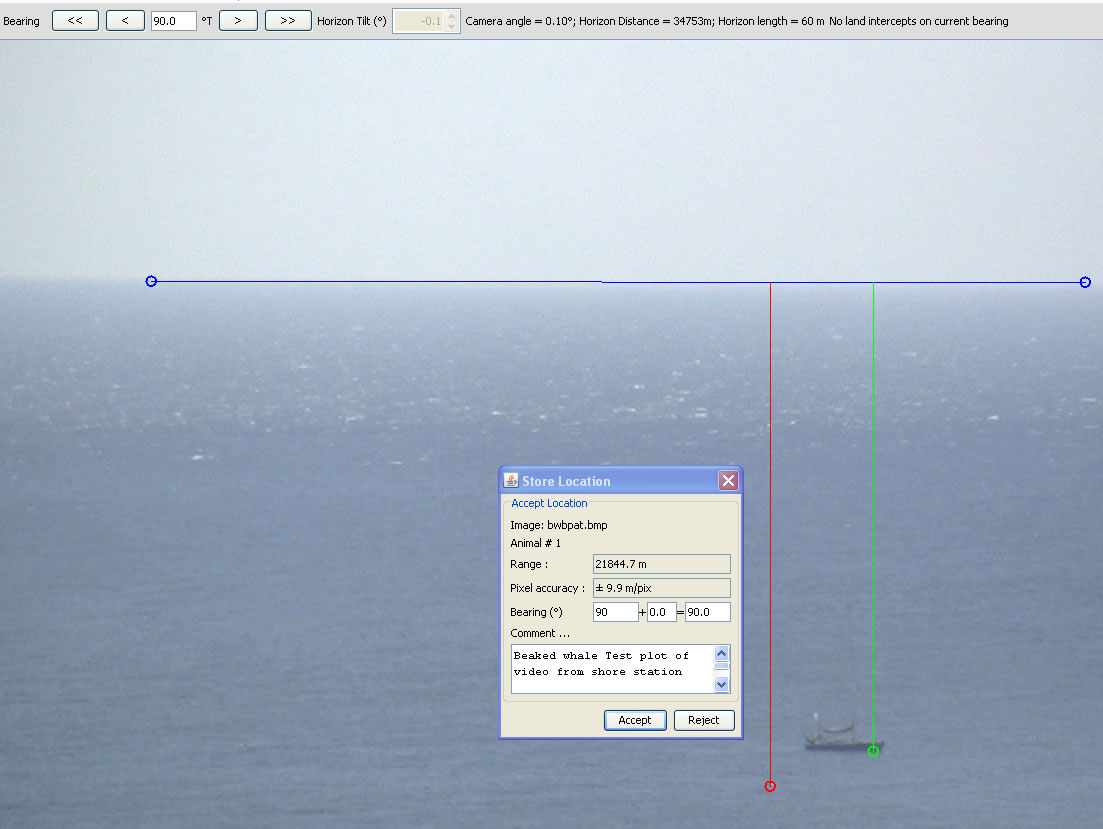
To measure range to an object shown in an image the operator must plot two points on the horizon (or shoreline) and a point at the waterline of the object itself.
Using the side panel, Load the image to be analysed from a file or the clipboard as appropriate.
Plot the required points using the cursor, staring with two points to define the horizon. For accuracy, these should be widely spaced. (To replot the horizon for example if an eror has been made click Clear Horizon on the side panel.)
Plot a point on the waterline of the object and a dialog will open showing the calculated range.
Press reject if an error in plotting has been made (the dialog will clear and you will be able to plot the object again). Otherwise, add a note to be stored in the database with the range data and press accept.
Additional objects in the same frame can now be plotted using the same horizon line. In the image below for example the location of both a boat and a beaked whale have been plotted.

The figure above shows an example of an image taken from a shore station showing a beaked whale close to a vessel. The location of both the vessel and the whale have been plotted.
If Bearings have been obtained manually (e.g. from a bearing ring or compass) then they should be entered as true bearings in the box in the bar at the top of the display window. The incremental angle for each point plotted within the image is calculated and added to the bearing angle.
PAMGuard includes modules for measuring bearings automatically and help on these can be found here Angle Measurement
Settings will remain in place unless changed. To analyse additional images with the same settings simply Load the new image.